Can Ultrasonic Cleaning Restore Your Vinyl Records?
An ultrasonic vinyl record cleaner uses sound waves in a liquid bath to shake loose dirt that a brush may not reach inside the grooves. It can make dirty or neglected records play quieter, but it will not fix scratches, groove wear, or bad pressings. The best results come from a simple routine: clean with low-residue water, avoid strong chemicals, dry fully, and store the record in a fresh sleeve.
How ultrasonic record cleaning works
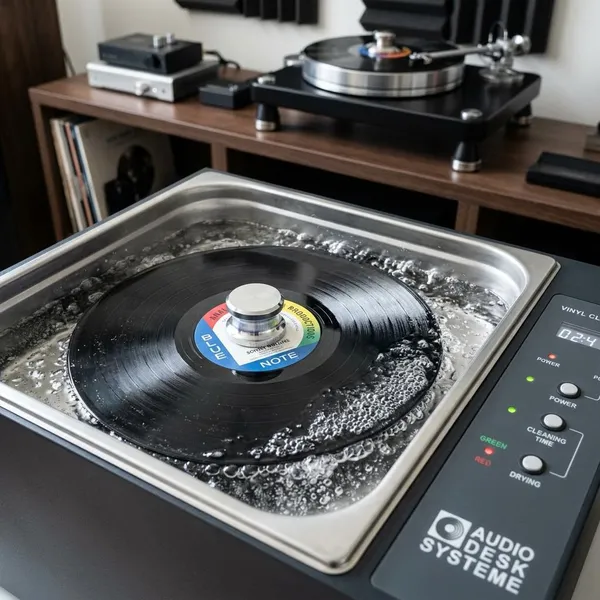
Ultrasonic cleaning is useful because vinyl grooves are narrow enough to hold dust, dried fingerprints, smoke film, sleeve fibers, and pressing residue even when the record looks clean. The machine does not scrub the record in the usual sense. It uses moving liquid, microscopic bubbles, and steady rotation to reach the playing surface more evenly.
Cavitation creates tiny bubbles in the liquid
Cavitation is the main cleaning action. The ultrasonic transducers send high-frequency energy through the water, which creates tiny bubbles that rapidly form and collapse. Those collapses create small bursts of movement in the liquid, helping lift contamination from the record surface without you pressing a brush into the grooves.
The bubbles loosen dirt inside the grooves
The real benefit is groove access. A dry brush can remove loose surface dust, but it may not remove oily fingerprints, old sleeve debris, or residue sitting lower in the groove. Ultrasonic cleaning gives the liquid a better chance to reach those spots.
- Good candidate: a used record with paper dust, storage grime, or fingerprints.
- Limited benefit: a record with scratches, non-fill, groove wear, or pressing defects.
- Worth a short clean: a new LP that looks clean but has static dust or factory residue.
Record rotation exposes the full surface evenly
Rotation keeps the cleaning from being concentrated in one area. As the record turns through the bath, both sides get a more even exposure to the active liquid, and the label can stay above the waterline when the machine is set up correctly.
This matters most when cleaning more than one record at a time. If the spacing is too tight or the record is mounted poorly, the inner sides of the discs may not clean as evenly as the outside faces. Slow, stable rotation is usually more useful than chasing the longest possible cycle.
How to clean vinyl records with an ultrasonic cleaner
The safest workflow is not complicated: check the record, remove heavy dirt first, use the right liquid level, choose a sensible cycle, dry completely, and put the record into a clean sleeve. The first thing to check is whether the noise is likely dirt-related. If the record is visibly scratched or worn, cleaning can still remove grime, but it should not be expected to make the damage disappear.
Inspect and pre-clean heavy dirt
Look at the record under bright light before it goes into the tank. Loose grit, sticky spots, moldy residue, or thick dust should be removed first with a record-safe brush, cloth, or manual pre-wash. Dropping a filthy thrift-store LP straight into the bath can dirty the water quickly and spread that contamination to the next record.
For a lightly dusty new record, a pre-clean may be unnecessary. For a garage-sale stack that has lived in old paper sleeves for years, pre-cleaning is usually the difference between a useful ultrasonic session and a tank full of floating grime.
Fill the tank with the cleaning solution
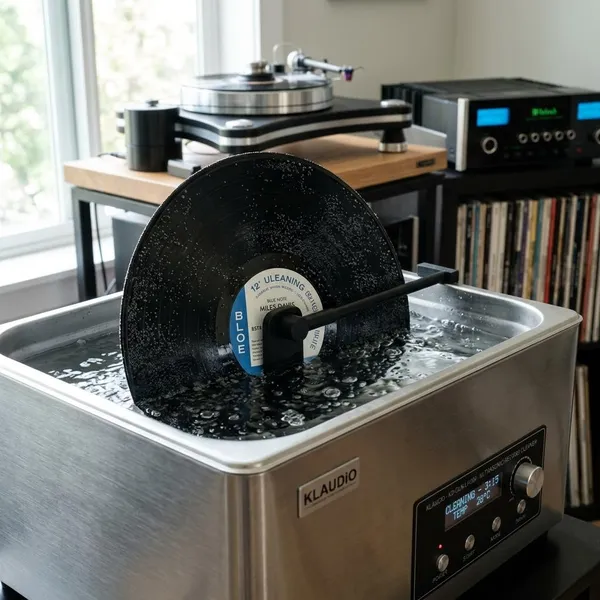
Fill the tank to the level recommended for your machine so the playing surface is covered and the label stays dry. Distilled, deionized, purified, or low-mineral reverse osmosis water is a safer starting point than tap water because it is less likely to leave mineral spots as it dries.
Set the record and cleaning cycle
Mount the record securely and check three things before pressing start:
- Label position: the label should stay above the liquid or be properly protected.
- Record spacing: multiple records need enough room for liquid movement between them.
- Cycle length: use a modest cycle for clean-looking records and a longer allowed cycle only for dirtier ones.
Run the cleaning cycle
Let the cycle finish unless the record slips, the machine sounds wrong, or the bath is clearly contaminated. Watch the water during batch cleaning. Once it looks cloudy or gritty, it is no longer helping you get clean records.
- Clean the dirtiest records separately or pre-wash them first.
- Do not crowd the tank to save time.
- Change water sooner when cleaning used records from unknown storage.
- Inspect after drying before deciding on a second pass.
Dry the record completely
A clean record is not ready until it is fully dry. Moisture left in the grooves can attract dust, leave marks, or carry dissolved residue back onto the surface. Built-in drying is convenient, but a clean drying rack can work if the room is dust-free and the record is not handled while damp.
Return it to a clean inner sleeve
Do not put a freshly cleaned LP back into a dusty paper sleeve. Use a new or clean inner sleeve, preferably one that does not shed paper fibers. This small step protects the cleaning work better than running an extra wash cycle and then storing the record in the same dirty sleeve.
Storage still matters after cleaning: keep records vertical, away from heat, and out of damp spaces. A clean sleeve will not help much if the record is stored in a hot corner or a musty cabinet.
Best solution for ultrasonic record cleaning
The best solution is usually boring: clean water first, then a small amount of vinyl-safe surfactant only when the record or machine actually benefits from it. The mistake to avoid is treating ultrasonic cleaning like laundry, where more detergent feels stronger. With records, residue control is just as important as dirt removal.
Start with distilled or purified water
Start with distilled or purified water if you are unsure. It reduces the chance of mineral deposits and gives you a clean baseline for judging the machine. If a record improves with water alone, there is no need to complicate the process.
Add a vinyl-safe surfactant when needed
A surfactant helps the water wet the groove surface instead of beading up. It can be useful for fingerprints, smoke film, oily handling marks, or records that do not respond well to plain water. Choose a product commonly used for vinyl record cleaning and compatible with your machine's drying method.
If you clean mostly new records or lightly dusty records, you may not need surfactant every time. If you often buy used records from fairs, charity shops, or long-term storage, a carefully measured additive can make the wash more effective.
Use only the recommended amount
Use the smallest effective amount recommended for your cleaner or chosen record-cleaning fluid. Extra surfactant does not guarantee deeper cleaning; it mainly increases the chance of streaks, foam, or a film that needs another rinse.
Avoid harsh household cleaners
Avoid bleach, kitchen degreasers, scented detergents, window cleaners, and strong homemade mixtures unless a reputable record-cleaning product specifically calls for that use. Household cleaners can contain dyes, fragrance, anti-streak agents, or residues that make sense on counters but not in record grooves.
- Safe default: distilled or purified water.
- When needed: a measured vinyl-safe surfactant.
- Avoid: strong household cleaners and vague internet recipes.
How to choose an ultrasonic vinyl record cleaner
Choose the machine around your real routine, not the biggest specification on the box. A collector with 40 carefully stored records has different needs from someone who buys used LPs every weekend. Capacity, drying, spacing, maintenance, and storage space matter more than one impressive feature you will rarely use.
Match capacity to your collection size
If you clean one or two records at a time, a compact all-in-one machine may be easier to live with than a large tank. It costs more in some cases, but the simple workflow can mean you actually use it.
For a large used collection, batch capacity becomes more valuable. Cleaning several records in one session saves time, especially when you bring home a stack that should be washed before it reaches your main shelves.
Check cleaning and drying automation
Built-in drying is not essential, but it changes how often many people clean records. If the machine washes and dries with little handling, it is easier to clean a record before first play or after buying it used. If drying is manual, make sure you have a clean rack, enough space, and patience to let records dry fully.
| Routine | Better fit | Why it matters |
|---|---|---|
| Occasional cleaning | Compact or semi-automatic unit | Less setup makes small sessions easier. |
| Large used-record batches | Multi-record tank system | Capacity saves time, but spacing and drying need attention. |
| Apartment or shared room | Smaller all-in-one cleaner | Storage, noise, and drying space become practical limits. |
Check tank size and record spacing
Tank size should support the records you clean most often while leaving enough space between discs for the liquid to move. More slots are not always better if the records sit too close together. Check how the machine protects labels, how stable the spindle is, and whether it can handle standard LPs without awkward adjustments.
Consider maintenance and running costs
Maintenance is easy to underestimate. You may need to replace or clean filters, drain dirty water, wipe the tank, buy distilled water, and restock sleeves or cleaning fluid. A cheaper machine can become annoying if draining is messy or if parts are difficult to clean.
Choose a size that fits your space
A machine that fits your home is usually the better machine. Large tank systems can be good value, including budget bundle-style setups, but they need room for the tank, drying rack, water bottles, and clean sleeves. A compact all-in-one model may clean fewer records per batch, yet it can be the smarter choice if your listening area is small.
If you plan to clean records weekly, leave the machine somewhere accessible. If it has to be unpacked from a closet, filled in a sink, moved to a table, and packed away every time, convenience may matter more than maximum capacity.
Conclusion
Ultrasonic cleaning is a practical upgrade when dirt, sleeve dust, and handling residue are the main problems, especially for used records or collections that get played often. Keep the process simple, use clean low-mineral water, be careful with additives, dry fully, and choose a machine that matches your real cleaning habits rather than the largest capacity on paper.
FAQ
Do new vinyl records need ultrasonic cleaning?
Not always, but many benefit from a short clean before first play. New records can still carry paper dust, static debris, or pressing residue even when they look flawless.
Can ultrasonic cleaning remove every pop and click?
No. It can reduce noise caused by removable dirt, but scratches, groove wear, non-fill, and pressing defects will usually remain.
Do you need a drying function on an ultrasonic cleaner?
No, but it is useful if you clean often. Without built-in drying, use a clean rack and wait until both sides are fully dry before playing or sleeving the record.